Splitting Transactions

Weekly allows you to split transactions so that separate parts of the transactions can be “mapped” to different destinations.  Splitting transactions allows for more accuracy in how you manage the information that comes into Weekly.

Here are some typical use cases that split transactions allows you handle:

  1. Divide one transaction between Safe-to-Spend and a Fund (or multiple Funds).
  2. Handle the difference between actual irregular income amounts and budgeted income amounts.
  3. Handle charges from companies that bundle them, like for example Apple..
  4. Divide a charge between two different Safe-to-Spend categories. (What?!  Safe-to-Spend categories?  We don’t have them yet but soon!)

First let’s show you how to Split Transactions and then we will cover how you would handle each of these scenarios.

How To Split a Transaction

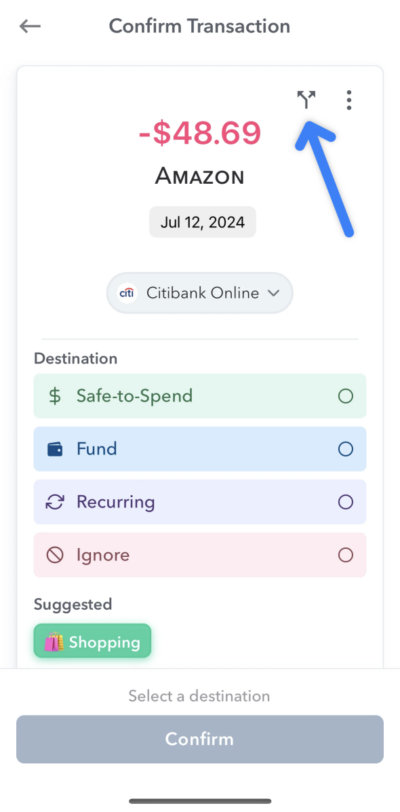
The split transaction icon looks like a set of divergent arrows and it shows up for a transaction at the top right of the “Confirm Transaction” screen.

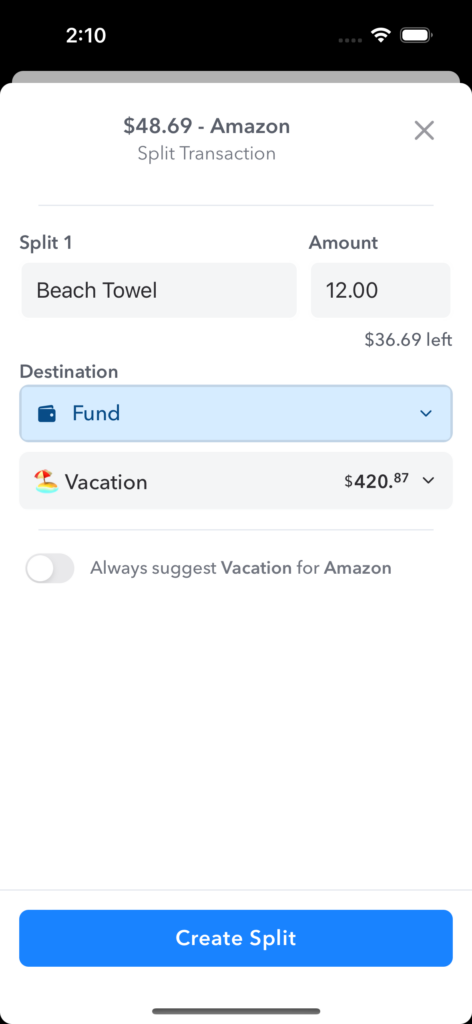
When you tap that it will bring you to the screen to create your first split.

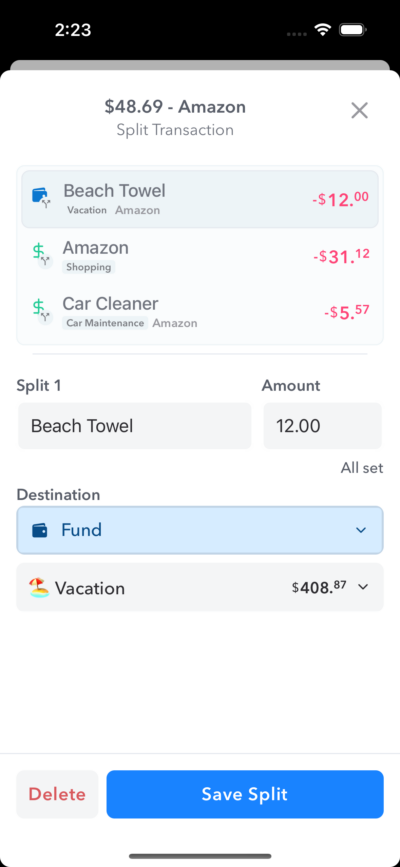
On the screen to create a split, you can define the name and the amount.  As you type in an amount, there is a prompt just below to show how much is left over.  When you set the amount, you can then select a Destination and then tap “Create Split”.

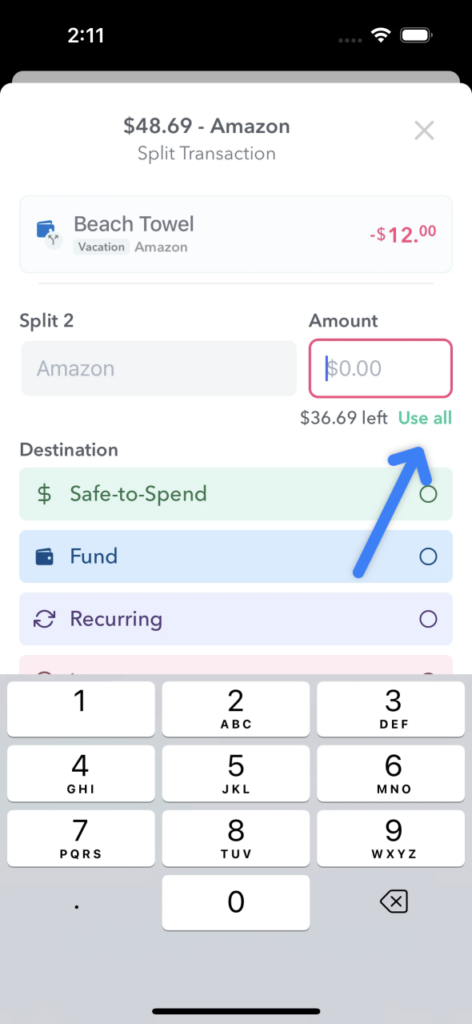
Then you will be brought to create your next split.  You go through the same process of setting a name, the amount and picking the destination.  When you are creating a second (or third or fourth) split underneath the amount that you type in you will see text to “Use all” which you can tap to pre-fill the amount box with the left over amount to complete the split.

If you finished your second split and haven’t used up all the transaction amount you can create another split and continue to create splits until the total transaction amount is used.

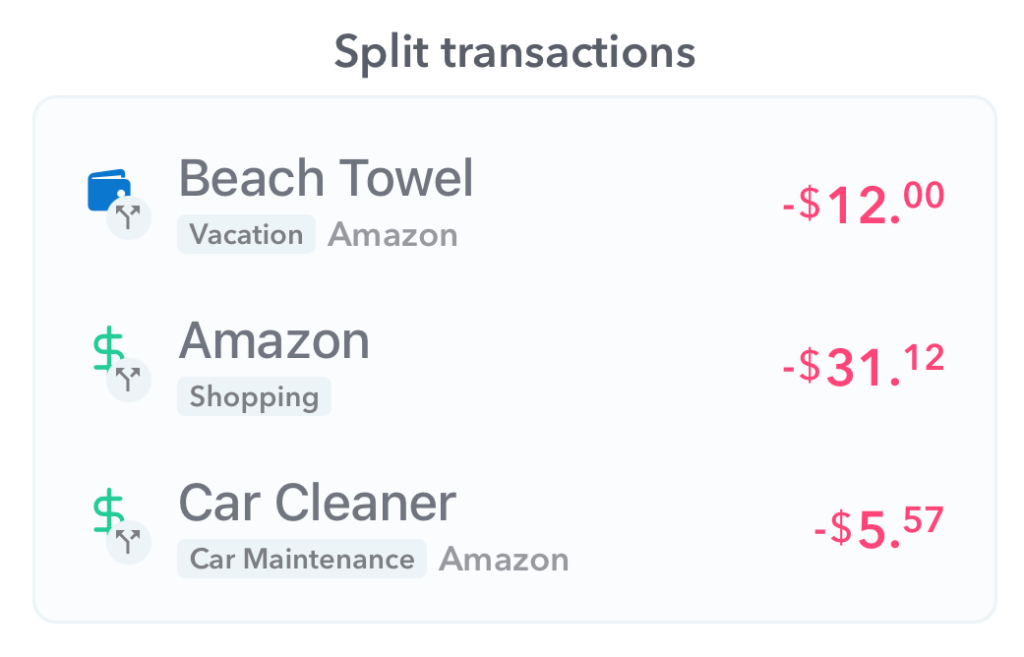
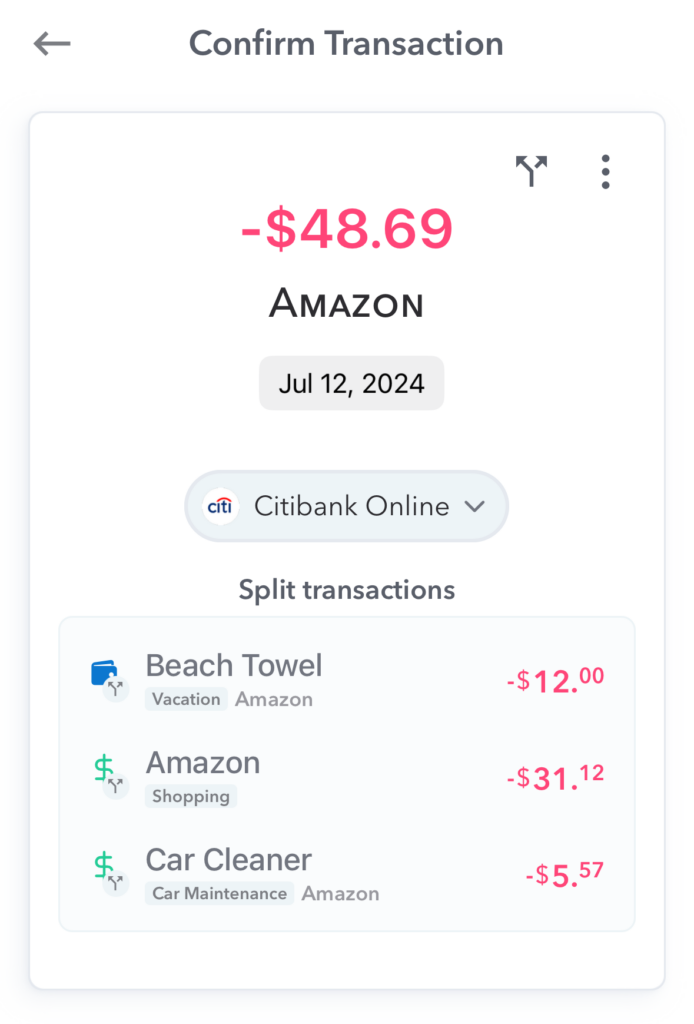
After you create a split that uses up the total amount of the transaction, the page will refresh and show you the review transaction screen with the splits shown that make up the transaction.  And if you need to edit the splits you just created you can double tap on the split.

Now that we have shown where the split is located, let’s cover each of our four use cases.

Dividing a transaction between Safe-to-Spend and a Fund

So a common scenario might be that you want to split a transaction between your Safe-to-Spend and a Fund.

So for example let’s say you shop at Amazon for $13.50 and want $10.00 of that transaction to be allocated to Safe-to-Spend and $3.50 to come from a Fund you created for Birthday spending. Below is a screenshot of mapping $10.00 that is mapped to Safe-to-Spend and $3.50 that is mapped to a “Birthday fund”.

Once you map the $3.50 to the fund, you will see the transaction overview with $10.00 mapped to Safe-to-Spend and $3.50 mapped to the Birthday fund.

Handle the difference between actual irregular income amounts and a budgeted income amounts

When you have income that is not salaried and varies, you can use split transactions to account for the difference between what you budgeted for and the actual amount.

So, for example, let’s say you are an hourly employee at set up an income budget item for $3,000 every month but when the money came in you actually had more money in the paycheck because you had worked for more hours than you thought you would have and the actual paycheck was $3,904.93. In this scenario, you can split the income transaction and map $3,000 to the recurring income item and the other $904.93 can be mapped to boost up your Safe-to-Spend or put into a fund.

Handle charges from companies that bundle them

Some companies may bundle your subscriptions into one transaction but actually for separate subscriptions. Apple is the chief example of this. As an example, let’s say you have a $2.99 subscription to iCloud and also a $7.99 subscription to Weekly and they both come out on the same day they will appear as one charge for $10.98. Using split transactions you can map them to two different recurring charges so that both recurring charges can appear as paid in your Upcoming Items report.

Map Safe-to-Spend transaction to different categories

SNEAK PEEK! – We are developing the ability to categorize your Safe-to-Spend transactions so you can see your spending trends. So you can categorize your Safe-to-Spend transactions as “Gas” or “Groceries”, for example, and see your spending week to week in different categories.

In the screenshot below, there is a $30.10 charge from Target, $20.00 of which is mapped to the “Shopping” category, and $10.10 can be allocated to another category like “Groceries”.

Conclusion

Split transaction helps you deal with real-life transaction scenarios and sort them in Weekly in ways to keep you on budget.